This post may contain affiliate links, which means we’ll receive a commission if you purchase through our link, at no extra cost to you. See our disclosure here.
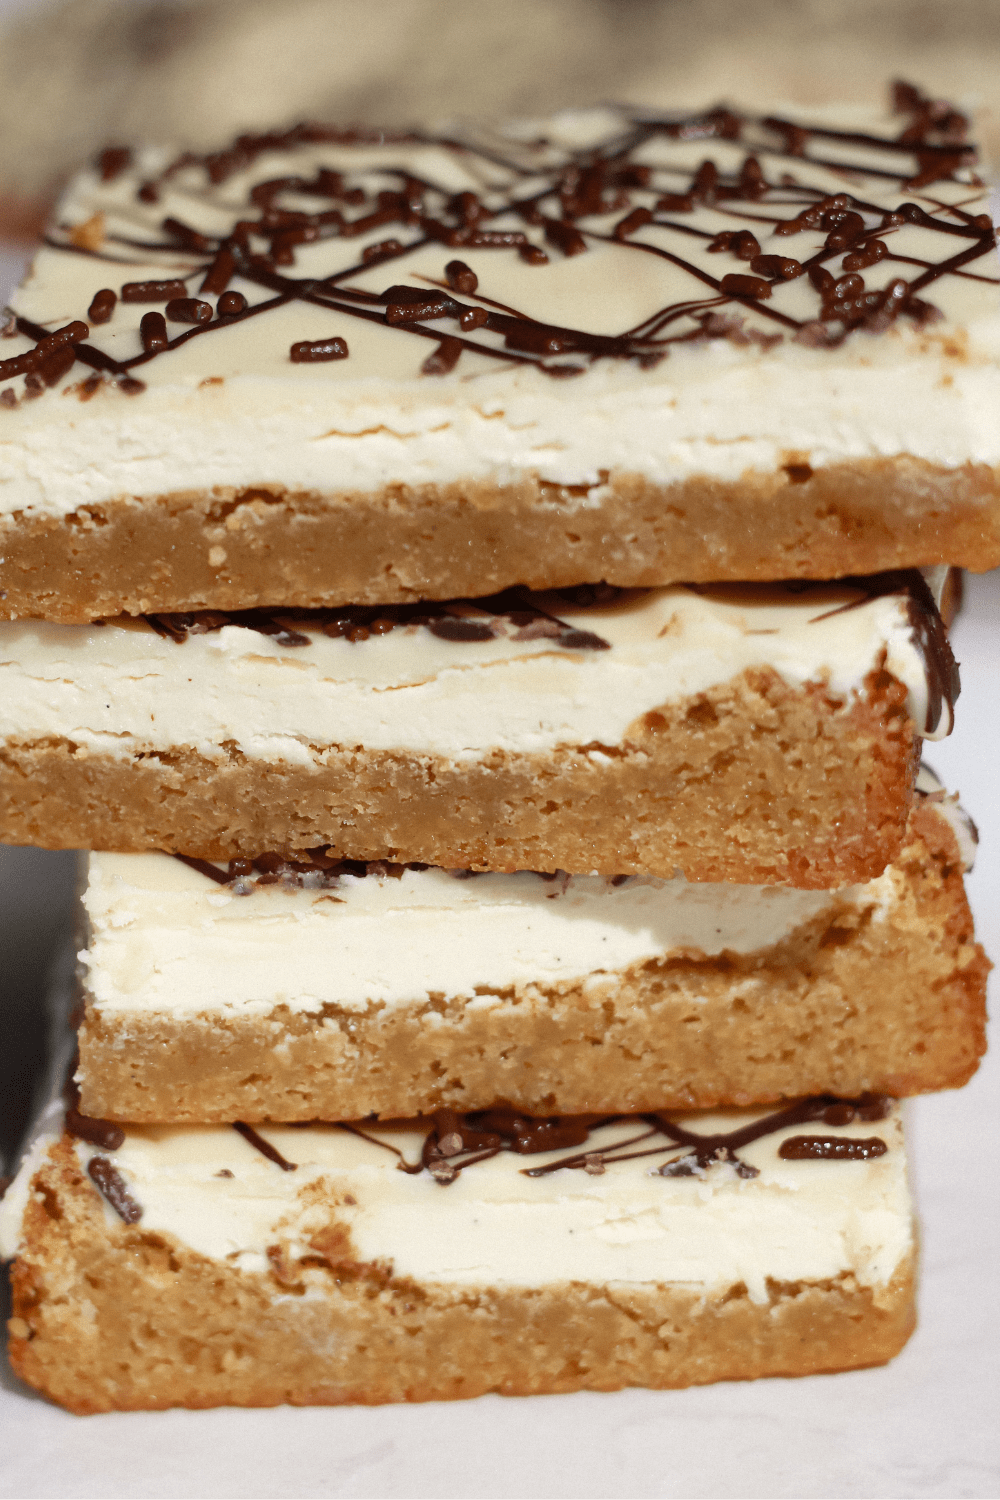
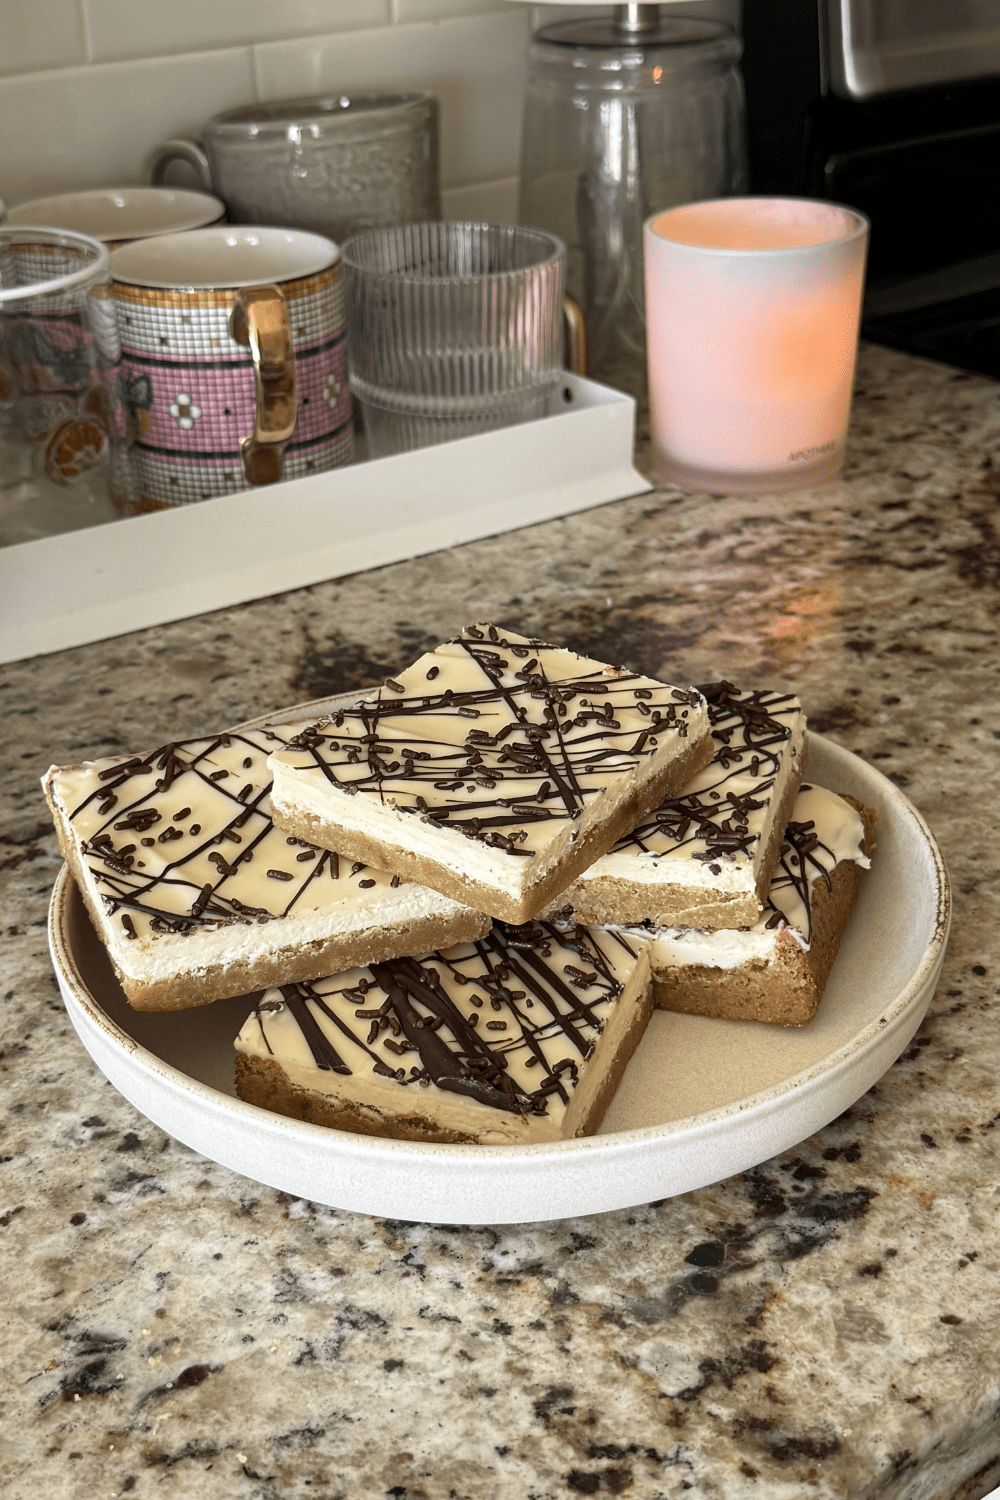
If you grew up loving Little Debbie Zebra Cakes, these Zebra Cake Blondie Bars are about to feel super nostalgic – in the sweetest way! They’re the kind of dessert that instantly stands out on any dessert table and will have everyone asking for the recipe.
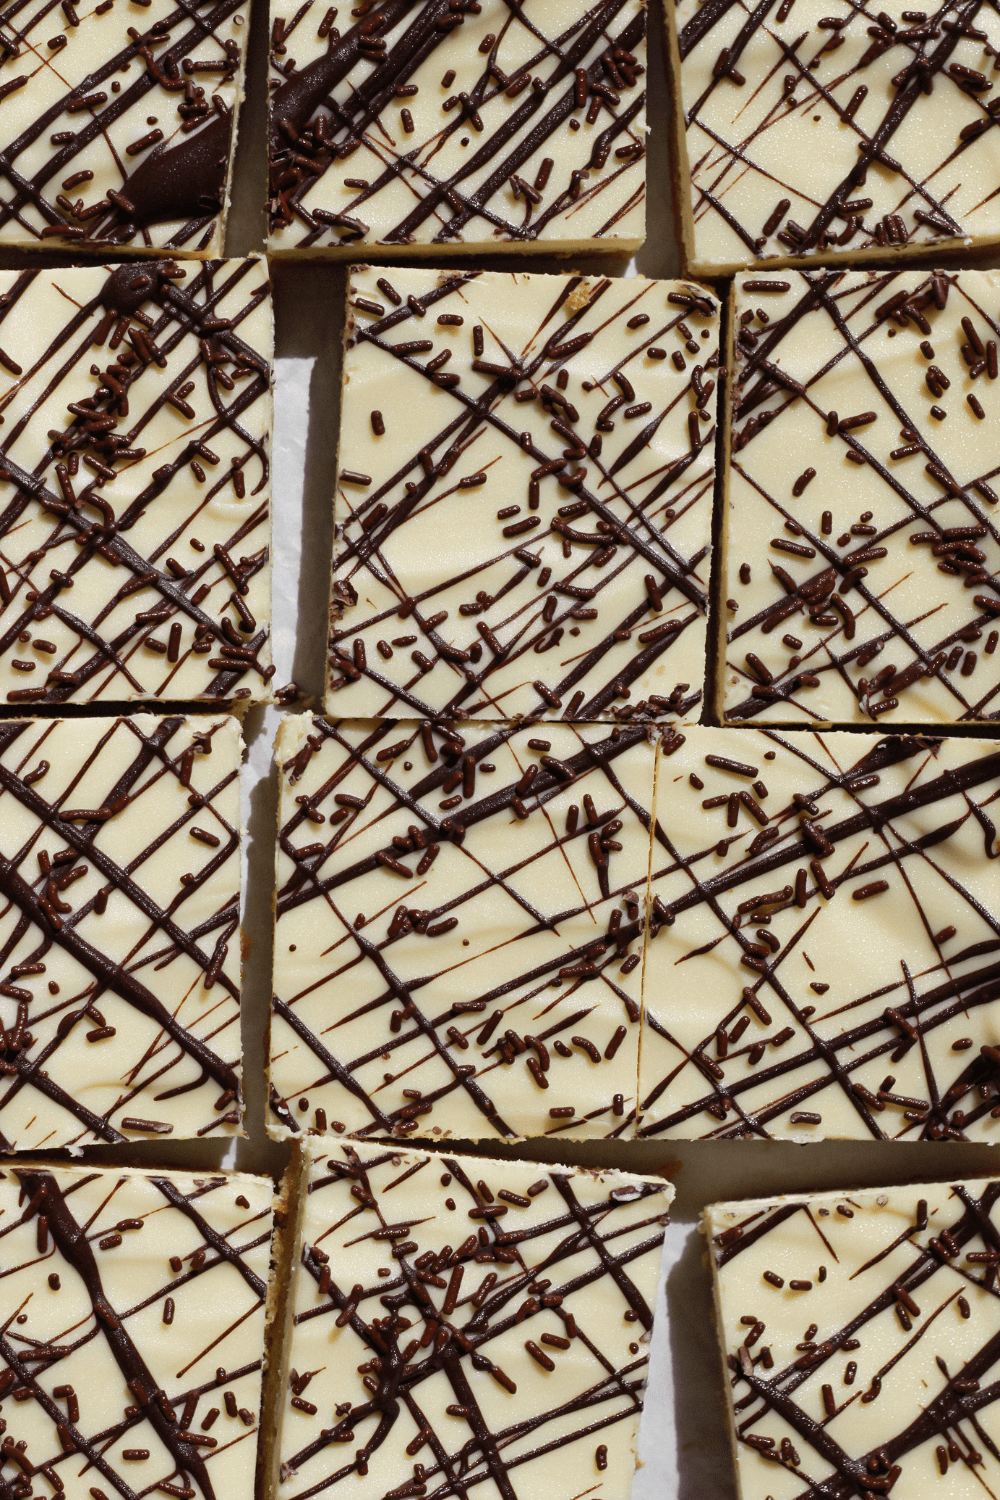
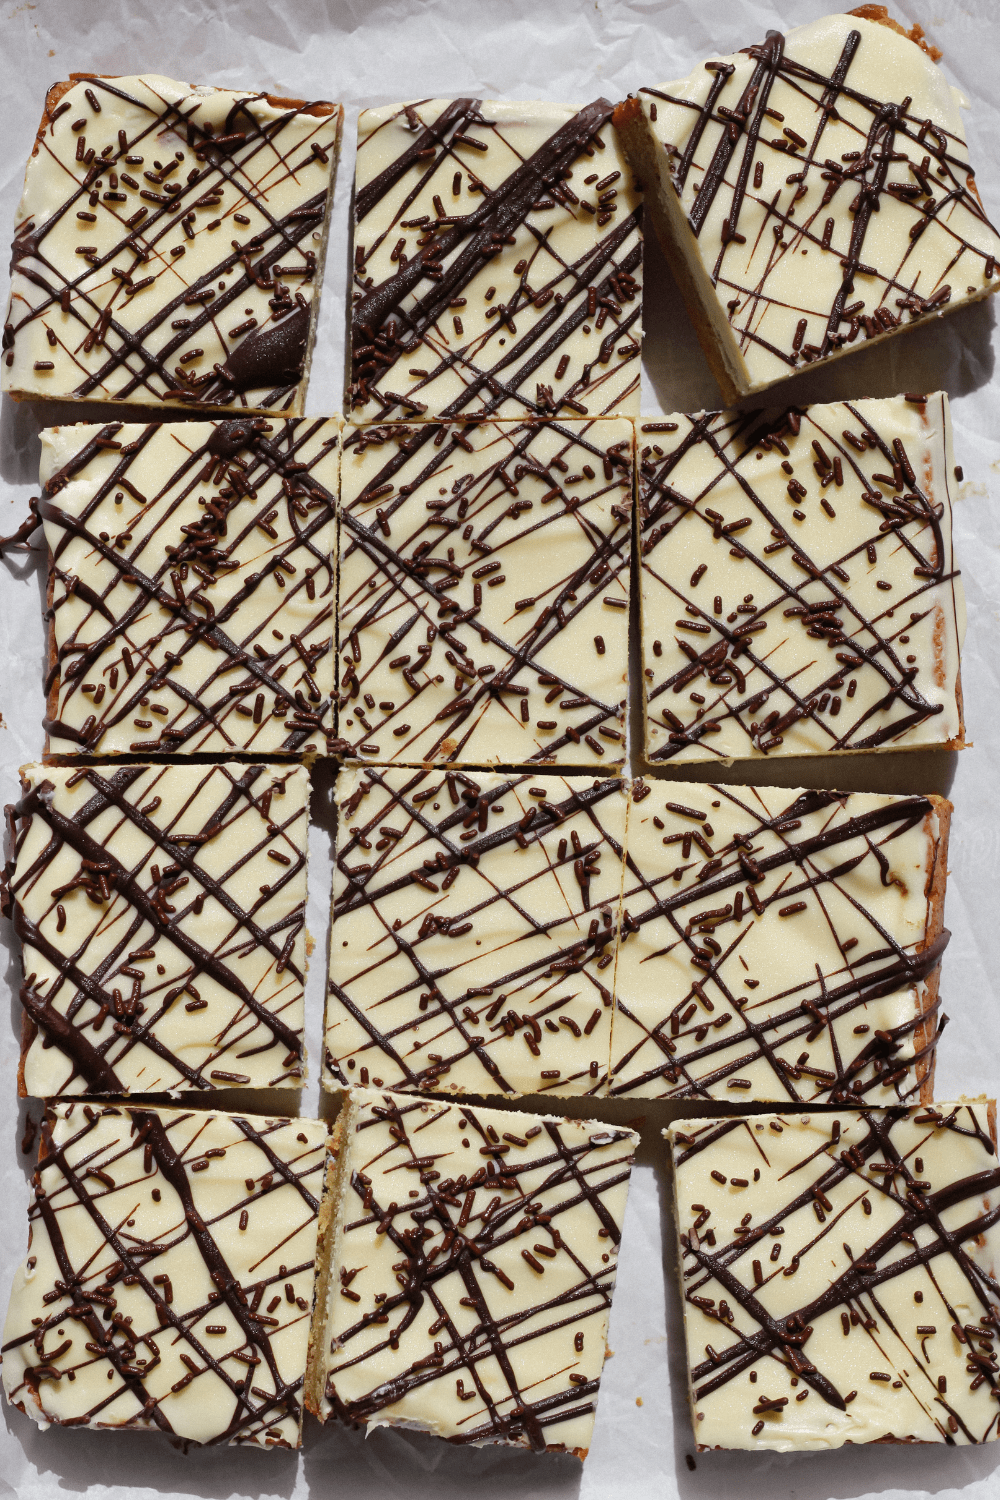
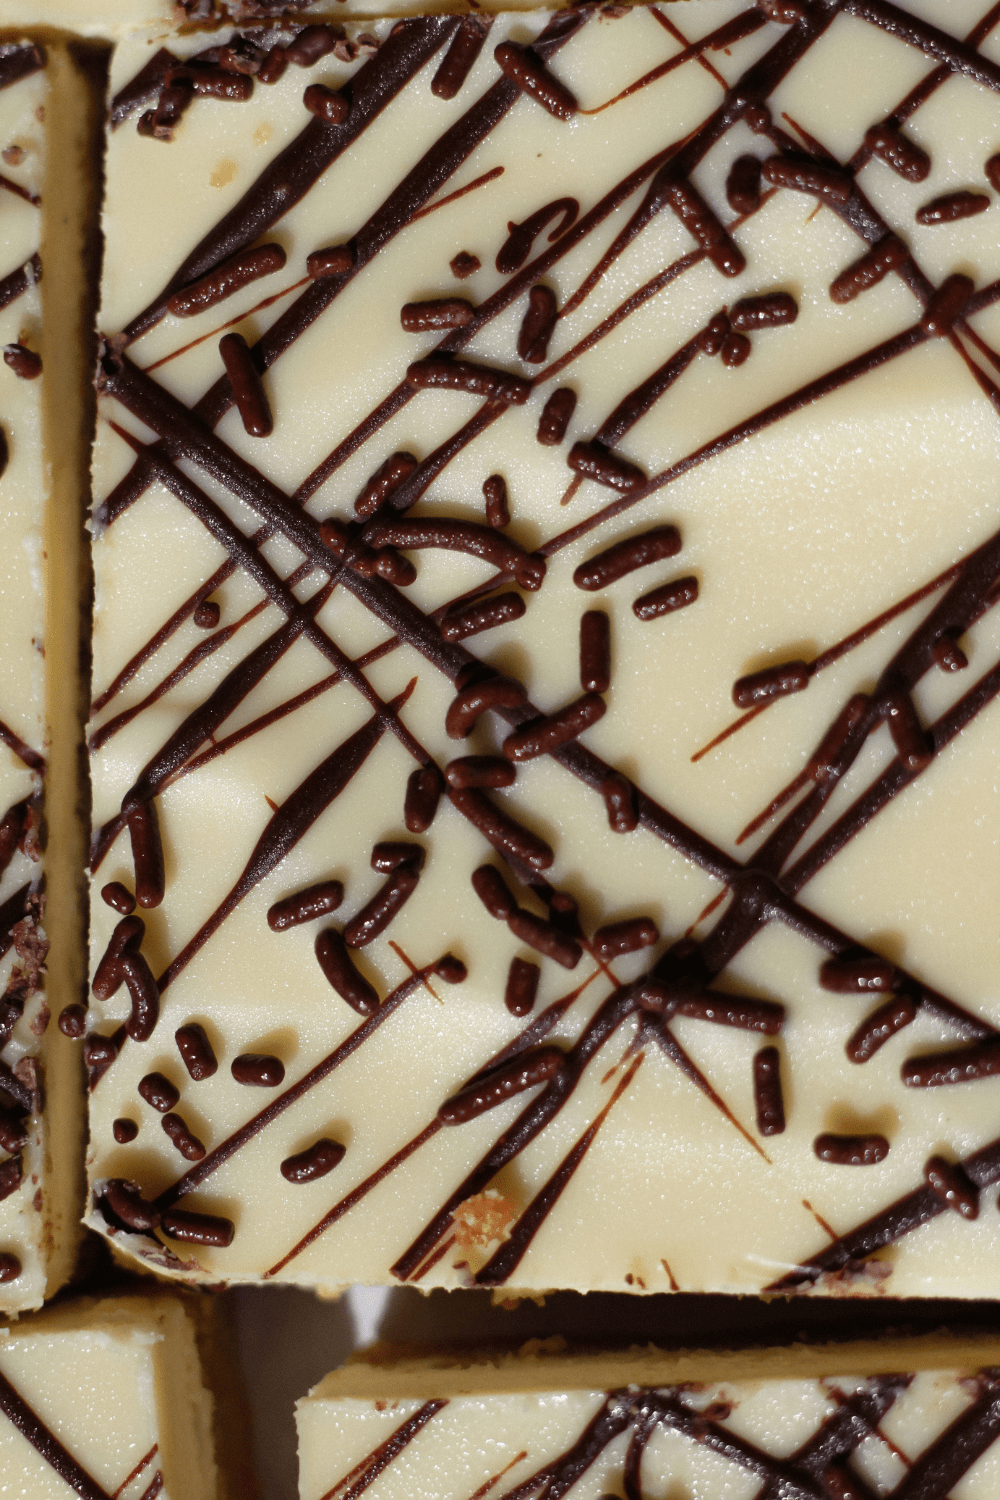
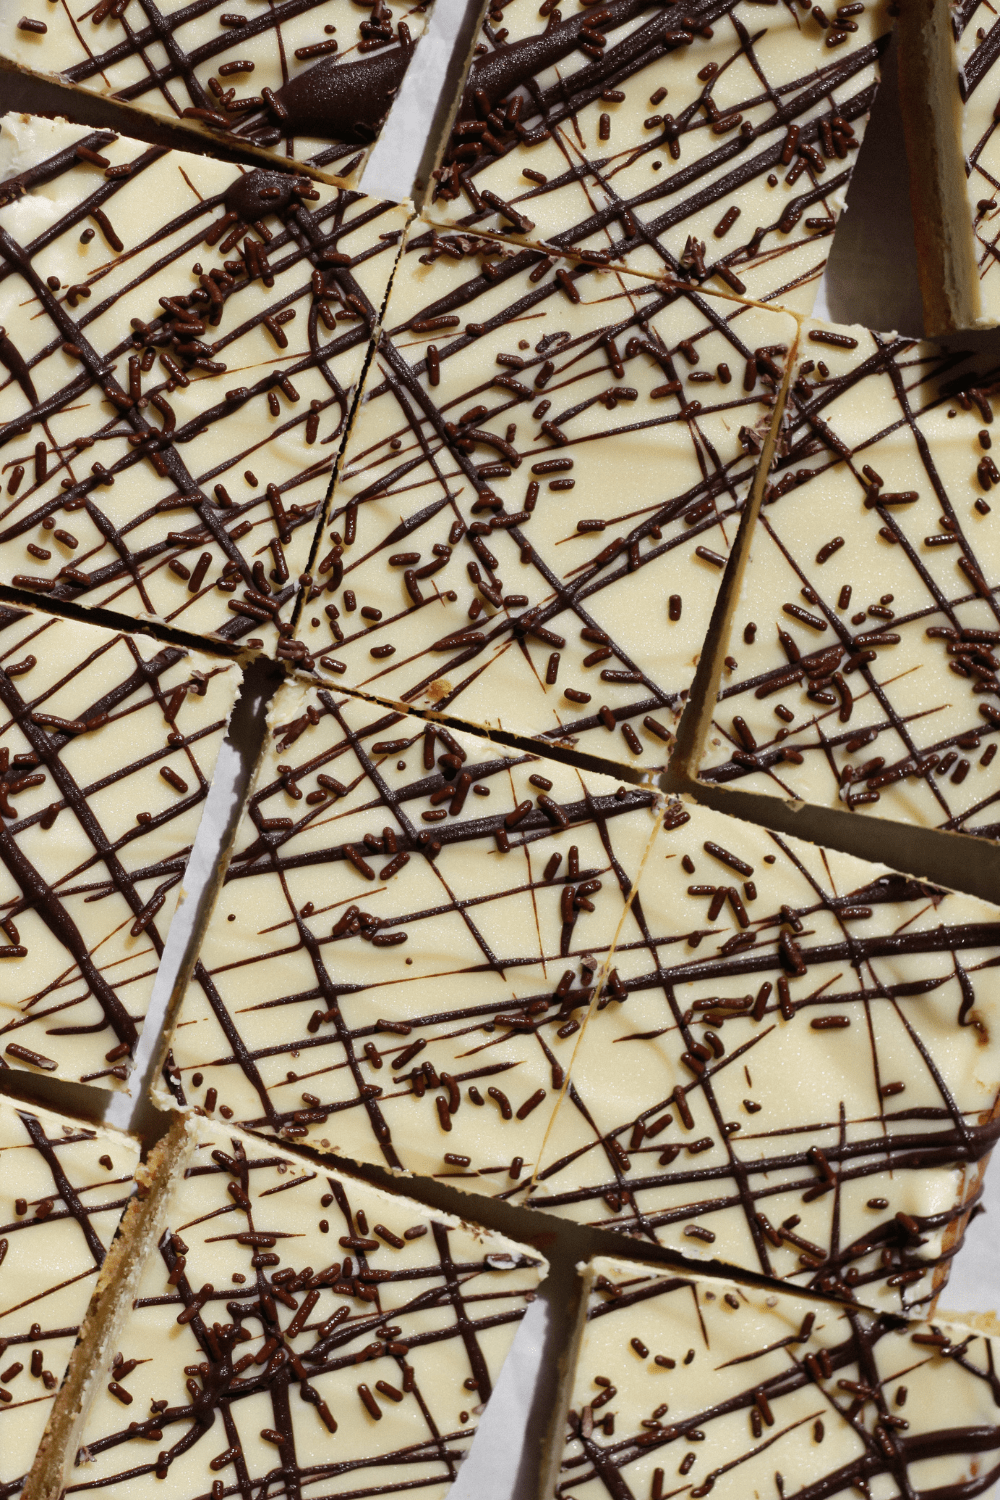
These bars start with a thin vanilla blondie base and are topped with a fluffy marshmallow buttercream, then are finished with a smooth layer of white chocolate over the top and a dark chocolate drizzle for that signature zebra stripe look.
The soft blondie and creamy vanilla center balance well with the hard crackle white chocolate top. These zebra bars are super simple to make, easy to slice and even easier to enjoy! Perfect for serving at parties, game nights or anytime you want a dessert that’s a little out of the box!
What You’ll Need
The blondie base
- 1 1/2 sticks butter, melted
- 1/2 cup white chocolate chips, melted
- 1 1/2 cups brown sugar
- 2 eggs + 1 egg yolk, room temp
- 2 tsp. vanilla extract
- 1 1/2 cups flour
- 1/4 tsp baking powder
- 1/2 tsp salt
Vanilla marshmallow filling
- 1 cup butter, softened
- 1 cup powdered sugar
- 1 cup Marshmallow Fluff
- 1 tsp vanilla extract
For the hardshell chocolate topping
- 1 cup white chocolate chips
- 1 Tbsp coconut oil
- 1/4 cup dark chocolate chips
- 2 tbsp chocolate sprinkles
How to Make Zebra Cake Blondie Bars, Step by Step
Step 1. Make the vanilla blondie base and cool.
Start by melting butter and white chocolate in a saucepan over medium heat. Stir this mixture frequently to make sure the chocolate chips melt evenly and don’t burn on the bottom of the pan.
Once the chocolate mixture is melted and smooth, pour the mixture into a large mixing bowl. Whisk in the in brown sugar to cool the chocolate butter mixture down before you whisk in the eggs. Add in one egg and one egg yolk at a time, until combined. Don’t forget to mix in the vanilla extract before mixing in the dry ingredients.
The dry ingredient mixture is made of flour, baking powder, and salt. Sitr this mixture in a separate bowl and fold into the batter until combined. Pour in a greased, lined 9×13’ pan and spread into an even layer to bake.
Step 2. Make whipped vanilla frosting.
This whipped vanilla frosting emulates the iconic zebra cake frosting filling. It is the defining feature that gives these bars that iconic snack cake flavor.
Homemade butter cream is whisked together with marshmallow fluff to give the icing a light, fluffy texture. Spread this marshmallow buttercream frosting over cooled blondies bars before chilling.
Step 3. Chill bars while you melt chocolate.
You’ll need to chill the bars before covering in chocolate. That way, the icing below doesn’t melt.
Pop the frosted blondies into the freezer for about 10-15 minutes while you melt the white chocolate coating.
Step 4. Spread melted chocolate over top of bars and decorate.
Using an icing knife or a rubber spatula, spread melted chocolate evenly over the top of the blondie bars.
Decorate with red icing drizzle and green sprinkles.
Step 5. Final chill before slicing a serving!
This extra chill is essential for the white chocolate to set on top. The white chocolate only takes about 10 minutes to solidify. Once the top is hard-set, take them out of the fridge to slice into 12-16 bars.
Tips for Perfect Vanilla Blondies
- Egg yolks add chewiness! Our goal was to make a soft and chewy blondie that wasn’t dry. One way to do that is to make sure you have enough fat in your batter. Adding an egg yolk increases the fat content a bit, helping to make them deliciously chewy.
- Don’t over-mix your batter. Over mixing the batter can create a drier, tougher blondie.
- Melt chocolate with butter over medium heat. White chocolate melts best with a bit of fat. So to avoid clumping of your chocolate, we recommend melting butter and white chocolate chips in a pan together before blending into you batter.
- Use a sharp knife to slice. To get clean slices, use a large sharp knife to cut. That way you can slice smoothly slice through the layers.
Easily remove dessert bars from the pan with this trick!
No one likes to leave bits stuck to the bottom of the pan. Try this fool-proof method to remove brownies from the pan every, single time!
- Butter the pan. Making sure to cover the bottoms, corners, and sides.
- Place a piece of parchment paper on the bottom of the panmaking sure it is long enough to hang above the batter 1-2 inches. This parchment paper will act like a sling for your brownies.
- After the dessert bars are baked and cooled. It is important that they are cooled for at least 10-15 minutes before you lift them from the pan. Carefully lift up on both sides of the parchment paper and lift up out of the pan. Place them on a cutting board to slice and serve.
How to store these dessert bars
You will need to keep these bars chilled for two reasons: the butter cream frosting and the hard chocolate shell. Store these bars in an airtight container in the refrigerator for up to 4 days.
Shop Our Kitchen Favorites

More Dessert Bar Recipes:
@mozielife A nostalgic childhood classic just got a glow up…🦓🍰 Introducing you to…the Zebra Cake Blondie Bar!! #zebracakes #littledebbie #blondie #dessertbar #nostalgiacore ♬ original sound – 𝐦𝐢𝐥𝐚𝐧𝐚❄️

Zebra Cake Blondie Bars
Description
We reimagined Little Debbie Snack Cakes into a dreamy Zebra Dessert Bar. A thin vanilla blondie base is topped with a fluffy marshmallow buttercream, then finished with a smooth layer of white chocolate and a dark chocolate drizzle for that signature zebra stripe look
Ingredients
Vanilla Blondies
- 1 1/2 sticks butter, melted
- 1/2 cup white chocolate chips, melted
- 1 1/2 cups brown sugar
- 2 eggs + 1 egg yolk, room temp
- 2 tsp. vanilla extract
- 1 1/2 cups flour
- 1/4 tsp baking powder
- 1/2 tsp salt
Icing and Chocolate Topping
- 1 cup butter, softened
- 1 cup powdered sugar
- 1 cup Marshmallow Fluff
- 1 tsp vanilla extract
- 1 cup white chocolate chips
- 1 Tbsp coconut oil
- 1/4 cup dark chocolate chips
- 2 tbsp chocolate sprinkles
Instructions
- Preheat oven to 350ºF. Butter and line an 9×13 inch rimmed baking pan with parchment paper. Buttering and lining the dish makes removing the bars super easy.
- In a medium bowl, whisk together your dry ingredients – flour, baking powder, salt and set aside.
- In a small saucepan over low heat, melt butter and white chocolate chips. Stir frequently to evenly melt the chocolate. Wait until it is just melted and smooth before removing from heat.
- Pour melted chocolate mixture into a separate bowl and whisk in vanilla and sugar. Whisk in eggs and egg yolk, one at a time until just blended together. Next add in flour mixture and fold into the batter with a spatula until the flour is fully mixed in. Careful not to over mix.
- Pour the batter into pan and spread into an even layer.
- Place in the oven and bake for 25-35 minutes until baked through. Use a toothpick or fork to test the doneness of the brownies. If your toothpick removes clean, the brownies are done. If not finished cooking, place back in the oven for 3-5 more minutes increments.
- Remove from oven and let the brownies cool for 10-15 minutes.
- While brownies are cooling, make the frosting. Using an electric stand mixer, whisk butter and sugar together. Add in marshmallow fluff, vanilla and mix until buttercream is fluffy.
- Spread icing over the top of the blondies in an even layer. Cover blondies with plastic wrap and place in the freezer for about 30 minutes to chill.
- Remove blondie sheet from the freezer. Melt white chocolate and coconut oil in a double boiler or in microwave (see note below for melting in microwave). Pour the melted white chocolate over the top of the blondies and spread in an even layer with icing knife or rubber spatula.
- Melt dark chocolate chips in a bowl with about 1 tsp of coconut oil.
- Drizzle melted dark chocolate over the top of the bars in a zig-zag pattern to created the iconic zebra cake look. Let the bars chill int the fridge to set for at least 10 minutes before slicing. Store bars in the fridge after serving, so they don’t melt.